Battle of Magersfontein: Difference between revisions
Epicenalti (talk | contribs) →British Forces: Changed Pole-Carew link to go directly to relevant individual |
|||
| Line 168: | Line 168: | ||
| style="background:#efefef;" colspan="2" align="center"|'''Infantry Brigades''' |
| style="background:#efefef;" colspan="2" align="center"|'''Infantry Brigades''' |
||
|- |
|- |
||
| width = "400pt"|'''1st (Guards) Brigade''': Major-General [[ |
| width = "400pt"|'''1st (Guards) Brigade''': Major-General [[Reginald_Pole-Carew_(British_Army_officer)|Reginald Pole-Carew]]||width="400pt"|'''9th Brigade''': Major-General [[Charles W. H. Douglas|Charles Whittingham Douglas]] |
||
|- |
|- |
||
|3rd Battalion, [[Grenadier Guards]]||1st Battalion [[Northumberland Fusiliers]] |
|3rd Battalion, [[Grenadier Guards]]||1st Battalion [[Northumberland Fusiliers]] |
||
Revision as of 13:54, 30 October 2023
| Battle of Magersfontein | |||||||
|---|---|---|---|---|---|---|---|
| Part of Second Boer War | |||||||
 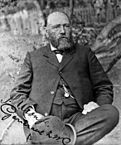 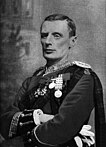 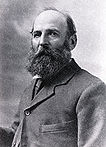 The Commanders: Lord Methuen, General Cronjé, General Wauchope†, General De La Rey | |||||||
| |||||||
| Belligerents | |||||||
|
|
| ||||||
| Commanders and leaders | |||||||
|
|
| ||||||
| Strength | |||||||
|
14,964 27 guns[1] |
8,500 5 guns 3 machine guns[2] | ||||||
| Casualties and losses | |||||||
| 948 killed or wounded[1] | 236 killed or wounded[3] | ||||||
Location of Magersfontein | |||||||
The Battle of Magersfontein[Note 1] (/ˈmɑːxərsfɒnteɪn/ MAH-khərss-fon-tayn) was fought on 11 December 1899, at Magersfontein, near Kimberley, South Africa, on the borders of the Cape Colony and the independent republic of the Orange Free State. British forces under Lieutenant General Lord Methuen were advancing north along the railway line from the Cape to relieve the siege of Kimberley, but their path was blocked at Magersfontein by a Boer force that was entrenched in the surrounding hills. The British had already fought a series of battles with the Boers, most recently at Modder River, where the advance was temporarily halted.
Lord Methuen failed to perform adequate reconnaissance in preparation for the impending battle and was unaware that Boer Vecht-generaal (Combat General) De la Rey had entrenched his forces at the foot of the hills, rather than the forward slopes, as was the accepted practice. That allowed the Boers to survive the initial British artillery bombardment, and when the British troops failed to deploy from a compact formation during their advance, the defenders inflicted heavy casualties. The Highland Brigade suffered the worst casualties, and on the Boer side, the Scandinavian Corps was destroyed. The Boers attained a tactical victory and succeeded in holding the British in their advance on Kimberley. The battle was the second of three battles during what became known as the Black Week of the Second Boer War: Stormberg on Sunday 10 December, Magersfontein on Monday 11 December and Colenso on Friday 15 December 1899.
Following their defeat, the British delayed at the Modder River for another two months while reinforcements were brought forward. General Lord Roberts was appointed Commander in Chief of the British forces in South Africa and moved to take personal command of the front. He subsequently lifted the siege of Kimberley and forced Cronje to surrender at the Battle of Paardeberg.
Background
In the early days of the war in the Cape Colony, the Boers surrounded and laid siege to the British garrisons in the towns of Kimberley and Mafeking and destroyed the railway bridge across the Orange River at Hopetown.[4] Substantial British reinforcements (an army corps under General Redvers Buller) arrived in South Africa and were dispersed to three main fronts. While Buller himself advanced from the port of Durban in Natal to relieve the besieged town of Ladysmith and a smaller detachment under Lieutenant General Gatacre secured the Cape Midlands, the reinforced 1st Division under Lord Methuen advanced from the Orange River to relieve Kimberley.[5]

Methuen advanced along the Cape–Transvaal railway line because a lack of water and pack animals made the reliable railway an obvious choice. Also, Buller had given him orders to evacuate the civilians in Kimberley and the railway was the only means of mass transport available.[6] But his strategy had the disadvantage of making the direction of his approach obvious.[7] Nevertheless, his army drove the Boers out of their defensive positions along the railway line at Belmont, Graspan, and the Modder River, at the cost of a thousand casualties. The British were forced to stop their advance within 16 miles (26 km) of Kimberley[8] at the Modder River crossing. The Boers had demolished the railway bridge when they retreated, and it had to be repaired before the army could advance any further. Methuen also needed several days for supplies and reinforcements to be brought forward, and for his extended supply line to be secured from sabotage.[9] The Boers were badly shaken by their three successive defeats and also required time to recover.[10] The delay gave them time to bring up reinforcements, to reorganise, and to improve their next line of defence at Magersfontein.[8]
Prelude
Boer defences
After the Battle of the Modder River, the Boers initially retreated to Jacobsdal, where a commando from Mafeking linked up with them.[11] The following day, Cronje moved his forces 10 miles (16 km) north to Scholtz Nek and Spytfontein,[Note 2] where they began to fortify themselves in the hills that made up the last defensible position along the railway line to Kimberley.[11] Although closer to the British camp than the Boer camp, Jacobsdal was left poorly defended, and continued to function as the Boers' supply base until 3 December.[11]
The Free State government decided to reinforce Cronje's position after the Battle of Belmont. Between eight hundred and a thousand men of the Heilbron, Kroonstad and Bethlehem commandos arrived at Spytfontein from Natal, accompanied by elements of the Ficksburg and Ladybrand commandos from the Basuto border. Reinforcements were also brought up from the Bloemhof and Wolmaranstad commandos who were besieging Kimberley.[11] The remainder of Cronje's force arrived from the siege of Mafeking. Their force now numbered 8,500 fighters,[2] excluding camp followers and the African labourers who performed the actual work of digging the Boer entrenchments.[12]
Koos de la Rey had been absent from the army immediately after the Battle of the Modder River, having gone to Jacobsdal to bury his son Adriaan, who had been killed by a British shell during the battle. He arrived at the defensive positions on 1 December[13] and surveyed the Boer lines the following day. He found the defences lacking, and realised that Cronje's position at Spytfontein was vulnerable to long range artillery fire from the hills at Magersfontein. He therefore recommended that they should move their defensive position forward to Magersfontein, to deny the British this opportunity.[14] Cronje, who was the more senior officer, disagreed with him, so De la Rey telegraphed his objections to President Martinus Theunis Steyn of the Orange Free State. After consulting with President Paul Kruger of the Transvaal, Steyn visited the front on 4 December at Kruger's suggestion.[15] Steyn also wished to settle a rift that had developed between the Transvaal and Free State Boers over the poor performance of his Free Staters in the battle on 28 November.[11] He spent the next day touring the camps and defences, then summoned a krijgsraad (council of war).
The Boers had learnt in earlier battles that the British artillery was superior in numbers to theirs, and could pound any high ground where they placed their guns or rifle pits. At Ladysmith, the Boers used rocks to build defensive sangars, but the ground at Magersfontein was sandy and less rocky.[16] De la Rey recommended, contrary to common practice, that they should entrench themselves forward of the line of kopjes,[Note 3] rather than on the facing slopes.[17] The trenches overlooking the receding, open ground sloping down towards the British axis of advance afforded the Boers concealment and protection from fire, and permitted them to use the flat trajectory of their Mauser rifles to greater effect.[18] Since the trenches were concealed, they could thwart the standard British tactic of advancing to within close range under cover of darkness and then storming the Boer position at daybreak.[19] A final consequence of De la Rey's defensive layout was that the troops would not be able to retreat, as Commandant General Marthinus Prinsloo's forces had done at Modder River.[19] Before leaving the front, Steyn raised the morale of the Free State burghers[Note 4] by dismissing Prinsloo, who was seen as the chief reason for the defeats in earlier battles.[2]
The new defensive line occupied a wide crescent-shaped front, extending for 6 miles (10 km) and straddling the road and the railway line that Methuen's advance depended upon. The main trench directly in front of the Magersfontein Hill was 2 miles (3.2 km) long,[18] and protected on the right flank by a single trench. The trenches that were to protect the left flank in the direction of the river were not completed before the battle commenced.[20] Two high wire fences complemented the natural obstacles created by the thick scrub bush. One ran north-northeast and marked the border of the Orange Free State, while a second protected the trenches in front of the Boer position.[21]
British plan


Methuen believed that the Boers were occupying the crests of the line of kopjes, as they had done at Belmont, but he was unable to reconnoitre the position; his mounted scouts could not roam the countryside freely on account of wire farm fences,[22] nor could they approach any closer than 1 mile (1.6 km) to the Boer positions without being driven off by rifle fire.[12] No serviceable maps were available; those in the possession of the British officers had been prepared for the purposes of land registration, with no consideration of military operations. Officers supplemented these maps with hasty sketches based on limited daily reconnaissance.[5] The poor maps and lack of reconnaissance would prove critical to the outcome of the battle.[23]
Ever since the victory against an Egyptian army at the Battle of Tel-el-Kebir, the standard British tactic against an entrenched position was an approach march at night in close order to maintain cohesion, followed by deployment into open order within a few hundred yards of the objective and a frontal attack with the bayonet at first light. Methuen planned to bombard the Boer positions with artillery from 16:50 to 18:30 on 10 December. Following the barrage, the newly arrived Highland Brigade under Major General Wauchope was to make a night march that would position them to launch a frontal attack on the Boers at dawn the following day.[24] Wauchope had argued for a flanking attack along the Modder River, but had been unable to convince his superior.[25]
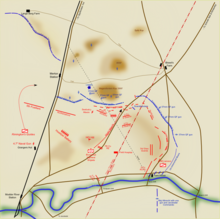
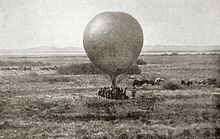
Methuen's orders show that his intention was to "hold the enemy on the north and to deliver an attack on the southern end of Magersfontein Ridge."[26] The advance was to be made in three columns. The first column consisted of the Highland Brigade, the 9th Lancers, the 2nd King's Own Yorkshire Light Infantry, and supporting artillery and engineer sections as well as a balloon section.[26] The first column was ordered to march directly on the south-western spur of the kopje and on arrival, before dawn, the 2nd Black Watch were to move east of the kopje, where he believed the Boers had a strong-point. He ordered the 2nd Seaforth Highlanders to advance to the south-eastern point of the hill, and the 1st Argyll and Sutherland Highlanders to extend the line to the left. The 1st Highland Light Infantry was to advance as a reserve. All units were to advance in a mass of quarter columns, the most compact formation in the drill book: 3,500 men in 30 companies aligned in 90 files, all compressed into a column 45 yards (41 m) wide and 160 yards (150 m) long,[27] with the outer sections using ropes to guide the four battalions in their night march and deployment for the dawn attack.[28] The second column, on the left under Major-General Reginald Pole-Carew, consisted of a battalion from the 9th Brigade, the Naval Brigade with a 4.7-inch naval gun, and Rimington's Guides (a mounted infantry unit raised in Cape Town). The third column, led by Major-General Sir Henry Edward Colville, was in reserve and was composed of the 12th Lancers, the Guards Brigade, and artillery, engineer, and medical support elements.[26]
Advance to attack
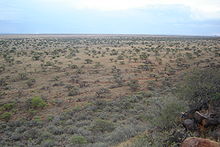
A drizzle started by mid-afternoon on 10 December and continued throughout the artillery bombardment, which was delivered by 24 field guns, four howitzers, and a 4.7-inch naval gun. In preparation for the attack, the British soldiers bivouacked in the rain 3 miles (4.8 km) from the Boer lines.[29] Instead of "softening" the Boer positions, the explosions of lyddite shells against the facing slopes above their trenches merely alerted the Boers to the impending attack.[27] As midnight approached, the rain increased to a downpour and the leading elements of the Highland Brigade commenced their advance towards their objective at the southern end of Magersfontein ridge.[28][30] Wauchope had made a similar night march in his advance on Omdurman in 1898, but this time he was faced not by flat desert terrain and clear skies, but rather by torrential rain, rocky outcrops, and thorn scrub, which caused delays and annoyance.[31] The thunderstorm and the high iron ore content of the surrounding hills played havoc with compasses and navigation.[27]
The brigade was advancing in quarter column as directed by Methuen's orders. The soldiers advanced packed as closely together as possible, with each ordered to grasp his neighbour to prevent the men losing contact with each other in the darkness.[32] As first light approached, the storm abated and the Brigade was on course, but the delays put them 1,000 yards (910 m) from the line of hills. Wauchope's guide, Major Benson of the Royal Artillery, suggested to Wauchope that it was no longer safe to continue in closed formation and that the Brigade should deploy. Wauchope replied "... I'm afraid my men will lose direction. I think we will go a little further."[33] Still in quarter column, the Highlanders advanced further towards the unknown enemy lines, when an advancing British soldier tripped an alarm on the fence in front of the Boer trench.[34]
Battle
Highland Brigade trapped


The Highlanders had advanced to within 400 yards (370 m) of the Boer trenches when the Boers opened fire; the British had no time to reform from their compact quarter columns into a fighting formation.[35] Wauchope instructed the brigade to extend its order, but in the face of such close-range Boer fire, the changing formation was thrown into disarray and confusion. General Wauchope was killed by almost the first volley, as was Lieutenant-Colonel G. L. J. Goff, the commanding officer of the Argylls.[36] The men at the head of the brigade disentangled themselves from the dead and most of them fled.[37] Some of the Black Watch at the head of the column charged the Boer trenches; a few broke through, but as they climbed Magersfontein Hill they were engaged by their own artillery and Boer parties, including one led by General Cronje himself, who had been wandering the kopje since 01:00,[38] and were subsequently killed or captured. Others were shot while entangled in the wire fence in front of the trenches.[3] Conan Doyle points out that 700 of the British casualties that day occurred in the first five minutes of the engagement.[39]
An attempt was made to outflank the trenches on the right where a number of Boers were taken prisoner, but this action was soon blocked by the redeployment of Boer elements.[37] After sunrise, the remnants of the four battalions of the Highland Brigade were unable to advance or retreat due to Boer rifle fire. The only movement at that time was a team led by Lt. Lindsay, who managed to bring the Seaforth's Maxim forward to provide a degree of fire support. Later the Lancers were able to bring their Maxim forward and into action as well.[37] Methuen ordered all available artillery to provide fire support; the howitzers engaged at 4,000 yards (3,700 m) and the three field batteries at a range of 1 mile (1,600 m). The Horse Artillery advanced to the southern flank in an attempt to enfilade the trenches.[37] With all guns engaged, including the 4.7-inch naval gun commanded by Captain Bearcroft RN,[40] the Highlanders were given some respite from the Boer small-arms fire, and some men were able to withdraw. As with the preliminary barrage of the previous evening, most of the shot was however again directed at the facing slopes of the hills rather than the Boer trenches at their foot.[37]
Reinforcements arrive
As the day progressed, British reinforcements that were originally left to guard the camp near the Modder River started to arrive—first the Gordon Highlanders and later the 1st and 2nd Coldstream Guards. At the same time, Cronjé launched a fresh attack on the British southern (right) flank in an attempt to extend a salient to the left and behind the remaining Highlanders, cutting them off from the main British force. Initially the Seaforths attempted to stem this attack and ran into the Scandinavian Corps, which they quickly neutralised. The Seaforths then had to regroup, which prevented them from further action to halt the Boer attempts to encircle the Highland Brigade.[41] The Grenadier Guards, with five companies of the King's Own Yorkshire Light Infantry, were moved to counter the attack. The British only showed some sign of success after the freshly arrived battalions of the Coldstream Guards were committed too. But once the Coldstreams were committed, Methuen had engaged all of his reserves.[37]
The remaining Highlanders, now under the command of Lieutenant Colonel James Hughes-Hallet of the Seaforths,[42] had been lying prone under a harsh summer sun for most of the day with the Boers still attempting to encircle them from the south. In the late afternoon, those who remained alive stood up and fled west towards the main body of British troops. This unexpected move left many of the field guns which had been advanced to the front line over the course of the morning exposed to the Boers. Only a lack of initiative on the part of the Boers saved the guns from being captured. The gap created by the hurried withdrawal of the Highland Brigade was filled by the Gordons and the Scots Guards.[43]
Scandinavian volunteers
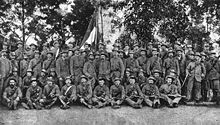
The Scandinavian Volunteer Corps (Skandinaviska Kåren) was not a true corps but rather a unit the size of a company, consisting of foreign volunteers.[44][Note 5] Approximately half of the Corps (refer to the Order of battle) was ordered to hold a forward position in the gap between the high ground held by Cronje and De la Rey's forces during the night of 10–11 December. The rest of the force was entrenched in defensive positions some 1,500 metres (1,600 yd) further north-east. In the early morning hours of 11 December, General Cronje ordered Commandant Tolly de Beer to abandon the outpost, but for some reason the order did not reach the Scandinavian section, which was left on its own.[45] Save for seven men, this section was destroyed while valiantly holding back the attack of the Seaforth Highlanders, who were in the process denied access between the hills and prevented from reaching the Boer guns.[46] Cronje understood the significance of this stand, and said in a subsequent letter to Kruger that "next to God we can thank the Scandinavians for our victory".[47]
Final retreat
In the late afternoon, a Boer messenger bearing a white flag arrived at a Scots Guard outpost to say that the British could send ambulances to collect their wounded lying in front of the trenches at the foot of the hills. Royal Army Medical Corps and Boer medical orderlies treated the wounded until the truce was broken by fire from the British naval gun, Captain (RN) Bearcroft not having been informed of the temporary armistice. A British medical orderly was sent to the Boers with apologies, and the truce was reinstated. When the truce was officially over, G Battery RHA, the 62nd Field Battery, and the Argyll and Sutherland Highlanders were tasked to screen the reorganisation and withdrawal of some of the British troops.[48]
The Boer guns, which had not yet seen action that day, opened fire on the cavalry at about 17:30 and the center of the British attack began to fall back.[49][50] Men instinctively withdrew to beyond the range of the Boer guns; Methuen decided that a total withdrawal was preferable to his troops spending the night near the Boer trenches.[50] Battalions and remnants of battalions retreated throughout the night and were mustered for roll call at the Modder River camp the next morning.[51]
Aftermath
Tactical dispositions
The Boers halted Methuen's advance to relieve the siege of Kimberley, defeated his superior force and inflicted heavy losses, particularly on the Highland Brigade. The British were forced to withdraw to the Modder River to regroup and to await further reinforcements.[50] Unlike previous occasions, where the Boers withdrew after an engagement, this time Cronje held the Magersfontein defence line,[3][52] knowing that Methuen would again be forced to continue his advance along his logistical railway "lifeline".[7]
Losses
The British lost 22 officers and 188 other ranks killed, 46 officers and 629 other ranks wounded, and one officer and 62 other ranks missing.[53] Of this, the Highland Brigade suffered losses of 747 men being killed, wounded, and missing. Among the battalions, the Black Watch suffered the most severely, losing 303 officers and other ranks.[53] On 12 December, when British ambulances again went forward to collect the dead and remaining wounded, they found Wauchope's body within 200 yards (180 m) of Cronjé's trenches.[3] The British camp at Modder River, and subsequently at Paardeberg, created ideal conditions for the spread of typhoid fever. By the time the British reached Bloemfontein, an epidemic had broken out amongst the troops, with 10,000–12,000 taken ill, and 1,200 deaths in the city.[54] The disease ultimately took more British lives during the war than were lost through enemy action.[55]
The animosity that the troops on the ground felt towards their leadership is captured in this contemporary poem by a soldier of the Black Watch:
Such was the day for our regiment,
Dread the revenge we will take.
Dearly we paid for the blunder
A drawing-room General's mistake.
Why weren't we told of the trenches?
Why weren't we told of the wire?
Why were we marched up in column,
May Tommy Atkins enquire…— Private Smith, December 1899.[56]
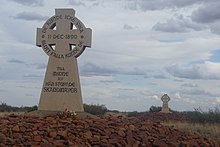
Boer losses are disputed. The official British account of the battle records 87 killed and 188 wounded,[53] while later accounts record a total loss of 236 men.[3] As with the Boers, several different figures regarding the strength of the Scandinavian outpost exist. British sources quote 80 men[42] and Scandinavian sources between 49 and 52 men. Uddgren records 52 men based on identified names, consisting of 26 Swedes, 11 Danes, 7 Finns, 4 Norwegians, and 4 of unknown nationality, of whom all but five were either killed, wounded or captured.[57][Note 6]
Strategic consequences
The week from 10 to 17 December 1899 rapidly became known to troops in the field—and to politicians in Britain—as "Black Week", during which the British suffered three defeats: the battles of Stormberg in the Cape Midlands and Colenso in Natal, as well as the Battle of Magersfontein.[59] The defeat at Magersfontein[Note 7] caused much consternation in Britain, particularly in Scotland, where the losses to the Highland regiments were keenly felt. Wauchope was well known in Scotland, having stood as a Parliamentary candidate for Midlothian in the general election of 1892.[61]
The reverberations of the Black Week defeats led to the hasty approval of large reinforcements being sent to South Africa, from both Britain and the Dominions. Although Cronje temporarily defeated the British and held up their advance, General Lord Roberts was appointed as overall Commander in Chief in South Africa; he took personal command on this front, and at the head of an army reinforced to 25,000 men, he relieved Kimberley on 15 February 1900. Cronje's retreating army was surrounded and forced to surrender at the Battle of Paardeberg on 27 February 1900.[62]
Lord Methuen later salvaged his reputation and career through successes he achieved against George Villebois-Mareuil at the Battle of Boschoff.[63] However, he was the only general captured by the Boers during the war.[64]
Victoria Cross awards
Three Victoria Cross citations were made for the action at Magersfontein:[65]
- Lieutenant Henry Edward Manning Douglas. Royal Army Medical Corps
- Corporal John Shaul. Highland Light Infantry
- Captain Ernest Beachcroft Beckwith Towse. Gordon Highlanders[Note 8]
-
Contemporary painting of the Black Watch at Magersfontein
-
A 4.7 inch Naval gun known as Joe Chamberlain firing at Magersfontein.
-
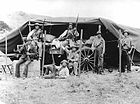
Boers on an ammunition wagon
-
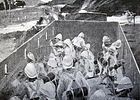
British troops in an armoured train, as was brought forward from Modder River
-
British BL 5" howitzer as used at Magersfontein
-
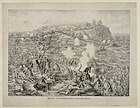
Contemporary British sketch of the battle
Order of battle
British Forces
| 1st Division[66] | Lieutenant-General Lord Paul Sanford Methuen GCB, GCMG, GCVO |
| Division Troops | |
| A Squadron, Life Guards | 12th Lancers (detached from the 1st Cavalry Brigade) |
| 18th Field Battery, Royal Artillery | 62nd Field Battery, Royal Artillery |
| 65th Field Battery, Royal Artillery | G Battery, Royal Horse Artillery |
| 11th & 26th Field Companies, Royal Engineers[67] | No 7 Field Hospital |
| Balloon Section, Royal Engineers | Detachment, Army Service Corps |
| Ammunition Column | Signals Detachment |
| Infantry Brigades | |
| 1st (Guards) Brigade: Major-General Reginald Pole-Carew | 9th Brigade: Major-General Charles Whittingham Douglas |
| 3rd Battalion, Grenadier Guards | 1st Battalion Northumberland Fusiliers |
| 1st Battalion, Coldstream Guards | 1st Battalion Loyal North Lancashire Regiment |
| 2nd Battalion, Coldstream Guards | 2nd Battalion Northamptonshire Regiment |
| 1st Battalion, Scots Guards | 2nd Battalion King's Own Yorkshire Light Infantry |
| No 18 Bearer Company[67] | Volunteer Bearer Company[67] |
| No 18 Field Hospital[67] | No 19 Field Hospital[67] |
| No 19 Company Army Service Corps[67] | No 20 Company Army Service Corps[67] |
The 3rd Highland Brigade was attached to the 1st Infantry Division from the 9th Infantry Division[68]
| 3rd (Highland) Brigade | Major General A.G. Wauchope CB |
| 2nd Battalion, Black Watch | 1st Battalion, Highland Light Infantry |
| 2nd Battalion, Seaforth Highlanders | 1st Battalion, Argyll & Sutherland Highlanders |
| No 1 Bearer Company[67] | No 8 Field Hospital[67] |
| No 14 Company, Army Service Corps[67] |
The below units were deployed for communication line protection duties and as such were under command of Major-General Methuen.[69]
| Communication protection duties | |
| 9th Queen's Royal Lancers | 2nd Battalion, Yorkshire Light Infantry (Two companies) |
| Rimington's Guides | |
Boer Forces
| South Western Military Force | General Piet Cronjé |
| (Figures represent strengths at time of mobilisation, actual strengths deployed at Magersfontein were lower)[66] | |
| Commandos under command of General A. Cronje[70] | |
| Commandos under command of General Piet Cronjé[70] | |
| Commandos under command of General Koos de la Rey[70] | |
Notes
- ^ Spelt incorrectly in various English texts as "Majersfontein", "Maaghersfontein" and "Maagersfontein".
- ^ Location of Scholtz Nek:28°54′42″S 24°42′27″E / 28.911564°S 24.707565°E. Location of Spytfontein: 28°52′56″S 24°41′00″E / 28.882230°S 24.683372°E
- ^ Hill or ridge.
- ^ Citizen soldiers or territorial soldiers.
- ^ According to Swedish combatant Erik Stålberg who was one of the few survivors of the battle from the Scandinavian corps, it consisted of 82 men. At the outbreak of war, a meeting was held in Pretoria on 12 October 1899 between members of the Scandinavian Organization in Transvaal (Skandinaviska Organisationen i Transvaal) and the South African Republic (ZAR) military staff with the intention of forming a Scandinavian volunteer unit to support the Boer republic against the British. The offer was accepted by the ZAR government. The military organisation issued the corps with Mod. 1888 Mauser rifles and 90 horses. Clothes suitable for use as uniforms were supplied by the Scandinavian Organization in Transvaal Committee. On the first day of recruitment, 68 Scandinavians volunteered for duty. The corps, now numbering 100 men, was ordered to the Mafeking front on 16 October 1899. They joined the forces of General Piet Cronje at Reitvlej near Mafeking on 23 October 1899, where they first saw action with the Boers.[44]
- ^ The losses of native Africans working or fighting for the two sides during the battle were not recorded. It is estimated that during the Anglo-Boer War, 100,000 black and Coloured people served with the British forces either as combatants, scouts, spies, transport and despatch riders or servants (of which, 10,000 were armed). The Boer force included an estimated 10,000 Africans, although they rarely carried weapons.[58]
- ^ The battle is commemorated with a pipe march called "The Highland Brigade at Magersfontein".[60]
- ^ In the UK National Archive Victoria Cross listings (See London Gazette, 6 July 1900), the locale for Captain Towse's award is incorrectly listed as Majesfontein instead of Magersfontein. The regiment and date are correct.
References
- ^ a b Maurice, (1998b), Vol. 6
- ^ a b c Kruger, (1960), p. 130
- ^ a b c d e Pakenham, (1979), p. 206
- ^ German General Staff, (1998), p. 78
- ^ a b German General Staff, (1998), p. 79
- ^ Miller, (1996)
- ^ a b Miller, (1999), p. 85
- ^ a b Conan Doyle, (1900), p. 150
- ^ Maurice, (1998a), p. 308
- ^ German General Staff, (1998), p. 85
- ^ a b c d e Tallboy, p. 384
- ^ a b Pakenham, (1979), p. 200
- ^ Meintjes, p. 125
- ^ Maurice, (1998a), p. 305
- ^ Pakenham, (1979), p. 199
- ^ Knight et al, p. 47
- ^ Creswicke, (1900), p. 172
- ^ a b Ralf, (1900), p. 178
- ^ a b Miller, p. 134
- ^ Miller, p. 133
- ^ Maurice, (1998a), p. 306
- ^ Tufnell et al, (1910), p. 59
- ^ Miller, (1999), p. 185
- ^ Creswicke, (1900), pp. 172–173
- ^ SAMHS, July 2003
- ^ a b c Maurice, (1998a), pp. 312–315
- ^ a b c Pakenham, (1979), p. 203
- ^ a b Creswicke, (1900), p. 173
- ^ Conan Doyle, (1900), p. 136
- ^ Tufnell et al, (1910), p. 61
- ^ Parkenham, (1979), p. 203
- ^ Maurice, (1998a), p. 316
- ^ Pakenham, (1979), p. 204
- ^ Conan Doyle, (1900), p. 154
- ^ Maurice, (1998a), p. 318
- ^ Maurice, (1998a), p. 319
- ^ a b c d e f Conan Doyle, (1900), pp. 155–157
- ^ Kruger, (1960), pp. 131–132
- ^ Conan Doyle, (1900), p. 144
- ^ Maurice, (1998a), p. 321
- ^ Maurice, (1998a), p. 327
- ^ a b Conan Doyle, (1900), p. 162
- ^ Conan Doyle, (1900), p. 159
- ^ a b Uddgren, (1924), pp. 8–19
- ^ Uddgren, (1924), p. 46
- ^ Uddgren, (1924), p. 47
- ^ Winquist, (1978), p. 171
- ^ Maurice, (1998a), p. 330
- ^ Conan Doyle, (1900), p. 142
- ^ a b c Conan Doyle, (1900), pp. 160–161
- ^ Conan Doyle, (1900), p. 161
- ^ Tufnell et al, (1910), p. 63
- ^ a b c Maurice, (1998a), pp. 329–330
- ^ De Villiers, (1984)
- ^ Fremont-Barnes, (2003), p. 86
- ^ Hopkins, Pat (2005). "The Black Watch at Magersfontein". Worst Journeys: An Anthology of South African Travel Disasters. Zebra. pp. 63–66. ISBN 1-77007-101-6.
- ^ Uddgren, (1924), p. 86
- ^ "The Role of Africans in the South African War". National Archives (UK). Retrieved 11 November 2010.[permanent dead link]
- ^ Barbary, (1975), p. 47
- ^ John McLellan, Dunoon (Composer). "Pipetunes". pipetunes.ca. Archived from the original on 28 September 2010. Retrieved 28 October 2010.
- ^ Baird, (1900), p. 166
- ^ Kruger, (1960)
- ^ Miller, (1999), pp. 185–186
- ^ Pakenham, (1979), p. 583
- ^ "Victoria Cross Registers". National Archives (UK). Retrieved 11 November 2010.
- ^ a b Maurice, (1998b), Vol. 7.
- ^ a b c d e f g h i j German General Staff (1998), Vol II, p. 238
- ^ Maurice, (1998b), Vol. 8
- ^ Maurice, (1998b), Vol. 5
- ^ a b c Maurice, (1998b), Vol 5, Map 13 and 13(a)
Sources
- Baird, William (1900). "General Wauchope". Oliphant, Anderson and Ferrier. Retrieved 26 October 2010.
- Barbary, James (1975). The Boer War. Harmondsworth: Puffin Books. ISBN 978-0-14-030697-2.
- Conan Doyle, Arthur (1900). The Great Boer War (8th Impression ed.). London: Smith, Elder & Co. ISBN 0-86977-074-8.
- Creswicke, Louis (1900). South Africa and the Transvaal War. Vol. 2: From the Commencement of the War to the Battle of Colenso, 15 Dec 1899 (1st ed.). Edinburgh: T.C. & E.C. Jack. OCLC 248490510.
- de Villiers, Professor J.C. (June 1984). "The Medical Aspect of the Anglo-Boer War, 1899–1902 Part ll". South African Military History Journal. 6 (3).
- Fremont-Barnes, Gregory (2003). The Boer War 1899–1902. Oxford: Osprey Publishing. p. 86. ISBN 1-84176-396-9.
- German General Staff (1998) [1st. pub. 1906 (Historical section of the Great General Staff, Berlin)]. The Advance to Pretoria after Paardeberg, the Upper Tugela Campaign, etc. The War in South Africa: October 1899 to February 1900. Nashville: The Battle Press. ISBN 0-89839-285-3.
- Knight, Ian; Ruggeri, Raffaele (2004). Boer Commando: 1876–1902. Oxford: Osprey Publishing. ISBN 1-84176-648-8.
- Kruger, Rayne (1960). Good-bye Dolly Grey: The Story of the Boer War. Lippincott. OCLC 220929457.
- Maurice, Major-General Sir Frederick (1998a) [1st. pub. 1906]. Volume 1. History of the War in South Africa 1899–1902. East Sussex: Naval and Military Press. OCLC 154660583.
- Maurice, Major-General Sir Frederick (1998b) [1st. pub. 1906]. Maps: Volumes 5 – 8. History of the War in South Africa 1899–1902. East Sussex: Naval and Military Press. OCLC 154660583.
- Meintjies, Johannes (1966). De La Rey-Lion of the West: A Biography. H. Keartland.
- Miller, Stephen M. (1999). Lord Methuen and the British Army: Failure and Redemption in South Africa. London: Routledge. ISBN 0-7146-4904-X.
- Miller, Stephen (4 December 1996). "Lord Methuen and the British Advance to the Modder River". Military History Journal. 10 (4). The South African Military History Society.
- Pakenham, Thomas (1979). The Boer War. Johannesburg: Jonathan Ball. ISBN 0-86850-046-1.
- Ralph, Julian (1900). "Chapter XIX: Battle of Maaghersfontein". Towards Pretoria; a Record of the War Between Briton and Boer, to the Relief of Kimberley. New York: Frederick A. Stokes. OCLC 1179791.
- Tallboy, G.P. (1902). The Times History of the War in South Africa, 1899–1902. London.
{{cite book}}:|work=ignored (help)CS1 maint: location missing publisher (link) - Tufnell, Wyndham Frederick (1910). A Handbook of the Boer War With General Map of South Africa and 18 Sketch Maps and Plans. London; Aldershot: Gale & Polden. OCLC 504434575.
- Uddgren, H.E. (1924). Hjältarna vid Magersfontein (in Swedish). Stockholm: Uddevalla. OCLC 105930561.
- Winquist, Alan H (1978). Scandinavians and South Africa: Their Impact on the Cultural, Social and Economic Development of Pre-1902 South Africa. Cape Town: A. A. Balkema. ISBN 0-86961-096-1.
- "Newsletter". South African Military History Society (SAMHS). July 2003.
Further reading
- Barbour, Fiona (December 1979). "Who was Magersfontein's 'Young Unknown Scottish Bugler'?". The South African Military History Society – Military History Journal. 4 (6).
- Breytenbach, JH (1983). Geskiedenis van die Tweede Vryheidsoorlog (History of the Second War of Liberation). Protea. ISBN 978-0-7970-2160-0.
- Cowan, Paul (2008). Scottish Military Disasters. New Wilson Publishing. ISBN 978-1-903238-96-7.
- Curtin, Philip D. (1998). Disease and Empire: The Health of European Troops in the Conquest of Africa. Cambridge University Press. ISBN 0-521-59835-4.
- Douglas, George (2006). The Life of Major-General Wauchope. Kessinger Publishing. ISBN 1-4286-0456-1.
- Duxbury, George Reginald (1997) [1977]. The Battle of Magersfontein, 11th December, 1899. Kimberley: McGregor Museum. ISBN 0-620-21125-3.
- Lane, Jack (2001). The War Diary of Burgher Jack Lane, 16 November 1899 to 27 February 1900. Van Riebeeck Society. ISBN 0-9584112-8-X.
- MacDonald, Ronald St. John (1918). Field Sanitation. London: Frowde, Hodder and Stoughton. OCLC 287182259.
- Robbins, David (2001). The Siege of Kimberley and the Battle of Magersfontein. Ravan Press. ISBN 0-86975-532-3.
- Saks, David (June 2001). "The Wartime Correspondence of Jeannot Weinberg". Military History Journal. 12 (1). The South African Military History Society.
External links
- "The Battle of Magersfontein". BritishBattles.com.


