Bassae Frieze: Difference between revisions
m →History: typo |
|||
| Line 94: | Line 94: | ||
==Description== |
==Description== |
||
Of the 23 slabs of the Ionic frieze 11 depict Greeks fighting centaurs and 12 represent Greeks fighting Amazons. Cooper and Madigan make a further distinction of the Trojan and Heraklean Amazonomachies following on from their determination of the |
Of the 23 slabs of the Ionic frieze 11 depict Greeks fighting centaurs and 12 represent Greeks fighting Amazons. Cooper and Madigan make a further distinction of the Trojan and Heraklean Amazonomachies following on from their determination of the blocks' arrangement. Yet contrary to customary practice these three scenes are not on separate sides of the building, but run continuously around the entablature with the only clear disjuncture at the northwest corner. This description follows Cooper and Madigan's reconstruction. |
||
===Trojan Amazonomachy=== |
===Trojan Amazonomachy=== |
||
| Line 139: | Line 139: | ||
Another important scene was designed to be viewed as you entered the northern doorway of the temple (albeit over twenty feet in the air). The section illustrated shows Heracles capturing the belt of [[Hippolyta]], the Queen of the Amazons. Heracles is shown holding a club and wearing a lion-skin as he completes the ninth of the twelve tasks set by his cousin [[Eurystheus]].<ref>[https://www.britishmuseum.org/explore/highlights/highlight_objects/gr/m/marble_from_temple_of_apollo-1.aspx Marble block from the frieze of the Temple of Apollo Epikourios], British Museum, retrieved June 2010</ref> This version of the story is attributed to [[Peisander]]<ref>[http://www.ancientlibrary.com/smith-bio/2501.html "Peisander" in William George Smith (ed), ''Dictionary of Greek and Roman Biography and Mythology''], London: J. Walton, 1849, retrieved June 2010</ref> as in more ancient versions Heracles is described as wearing armour.--> |
Another important scene was designed to be viewed as you entered the northern doorway of the temple (albeit over twenty feet in the air). The section illustrated shows Heracles capturing the belt of [[Hippolyta]], the Queen of the Amazons. Heracles is shown holding a club and wearing a lion-skin as he completes the ninth of the twelve tasks set by his cousin [[Eurystheus]].<ref>[https://www.britishmuseum.org/explore/highlights/highlight_objects/gr/m/marble_from_temple_of_apollo-1.aspx Marble block from the frieze of the Temple of Apollo Epikourios], British Museum, retrieved June 2010</ref> This version of the story is attributed to [[Peisander]]<ref>[http://www.ancientlibrary.com/smith-bio/2501.html "Peisander" in William George Smith (ed), ''Dictionary of Greek and Roman Biography and Mythology''], London: J. Walton, 1849, retrieved June 2010</ref> as in more ancient versions Heracles is described as wearing armour.--> |
||
==Access== |
==Access== |
||
The frieze can be seen in the British Museum's Gallery 16, near the [[Elgin Marbles]].<ref name="BM">[http://www.thebritishmuseum.ac.uk/explore/galleries/ancient_greece_and_rome/room_16_bassae_sculptures.aspx Bassae Sculpture], British Museum.</ref> The room is not always open, but researchers can request it be made available. |
The frieze can be seen in the British Museum's Gallery 16, near the [[Elgin Marbles]].<ref name="BM">[http://www.thebritishmuseum.ac.uk/explore/galleries/ancient_greece_and_rome/room_16_bassae_sculptures.aspx Bassae Sculpture], British Museum.</ref> The room is not always open, but researchers can request it be made available. |
||
Revision as of 16:25, 17 April 2017
| Bassae Frieze | |
|---|---|
 The Bassae Frieze in the British Museum. | |
| Material | marble |
| Size | 31m x 0.63m |
| Created | 420-400 B.C.E. |
| Discovered | 1811-1812 by a group including Cockerell, Haller, Linkh, Foster, Legh, Gropius, Baron von Stackelberg, Peter Brondsted |
| Present location | British Museum, London |
| Identification | 1815,1020.2; 1815,1020.7; 1815,1020.11 etc |
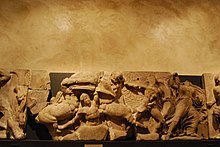
The Bassae Frieze is the high relief marble sculpture in 23 panels, 31m long by 0.63m high, made to decorate the interior of the cella of the Temple of Apollo Epikourios at Bassae. It was discovered in 1811 by Carl Haller and Charles Cockerell, and excavated the following year by an expedition of the Society of Travellers led by Haller and Otto von Stackelberg. This team cleared the temple site in an endeavour to recover the sculpture, and in the process revealed it was part of the larger sculptural programme of the temple including the metopes of an external Doric frieze and an over-life-size statue. The find spots of the internal Ionic frieze blocks were not recorded by the early archaeologists, so work on recreating the sequence of the frieze has been based on the internal evidence of the surviving slabs and this has been the subject of controversy.
Archaeological research has determined that the site of the present ruin of the temple of Apollo was in continuous use since the archaic period,[1] the existing temple is the last of four on the site and designated Apollo IV. Pausanias[2] records that this last sanctuary was dedicated to Apollo Epikourios (helper or succourer) by the Phigalians in thanks for delivery from the plague of 429 BC.[3] The architecture of the temple is one of the most strikingly unusual examples of the period, departing significantly from the norms of Doric and Ionic practice and including what is perhaps the first use of the Corinthian order and the first temple to have a continuous frieze around the interior of the naos. From the style of the frieze it belongs to the High Classical period, probably carved around 400 BC. Nothing is known of its authorship: despite an ascription of the metopes to Paionios[4] (since refuted[5]), the frieze cannot be associated with any sculptor, workshop or school. Instead Cooper identifies the artists of the frieze on morellian evidence as a group of three anonymous masters.[6]
The frieze was bought at auction by the British Museum in 1815 where it is now on permanent display in a specially constructed room in Gallery 16.[7] While the British Museum possesses most of the sculpture, eight fragments believed to belong to the frieze are in the National Museum, Athens.[8] Copies of this frieze decorate the walls of the Ashmolean Museum and London's Travellers Club.
History

As has been remarked the temple's existence had been known to scholars from the record in Pausanias but its location was uncertain until the accidental discovery in November 1765 by the French architect J. Bocher of the site, but unfortunately he was unable to survey the place due to his murder on his second visit.[9] Though the temple was visited several times in the intervening years,[10] it wasn't until the expedition of 1812 that excavations began. Of the informal group of antiquaries who undertook the enterprise[11] it fell to Haller to record the 1812 dig in his field notebook, the two copies of which[where?] are the only surviving details of the disposition of the intact site and finds since the drawings he made in 1811 were lost at sea.[12] However, though Haller's study was exacting by the standards of the day no record was kept of the findspots of the frieze, and only sketchy details that parts of the frieze were found on the temple floor inside the cella by Brondsted. Furthermore, the early explorers of the temple make little discussion of the sculpture in their subsequent publications, it was not until 1892 that they were formally published with Arthur Smith's catalogue of the British Museum's holdings.[13]

The site was explored in 1812 by British antiquaries who removed the twenty-three slabs of the Ionic cella frieze and transported them to Zante along with other sculptures. The frieze was bought at auction by the British Museum in 1815. This frieze's stones were removed by Charles Robert Cockerell. Cockerell decorated the walls of the Ashmolean Museum's Great Staircase and that of the Travellers Club with plaster casts of the same frieze.[14]
The frieze was purchased by the British Museum from James Linkh, Thomas Legh, Karl Haller von Hallerstein, George Christian Gropius, John Foster and Charles Robert Cockerell who had bought it at auction.[15]
Reconstruction in the British Museum
The Frieze was constructed between 420 and 400 BC. Unlike the rest of the temple, the blocks were carved from marble. Each of the 23 stones shows sections of the frieze but it is rare to find any continuation of the design from one stone to the next. It has also been proposed that the stones were not eventually installed as they had originally been proposed in the Temple of Apollo. These two complications are important as when the stones were found they had already fallen to the ground and they were already mixed in with other building rubble. So the stones are arranged in one logical way, but it is not clear if the frieze was actually either intended or designed to be as it now appears.[16]
The room where the frieze is displayed was specially constructed to be the same size as the main room in the Temple of Apollo. However, in the original placing they would have been seven metres in the air and close to the ceiling. The reconstruction puts the frieze at an easily viewable height.[16]
The table below shows the various proposals for how the frieze may have been originally designed to be displayed. There have been a number of ideas as to how the frieze should be arranged. The arrangement made by the British Museum follows that proposed by Peter Corbett, but others by the American scholar W.B.Dinsmoor and that proposed by Haller are amongst the conflicting theories shown below.[17] In some cases the authors disagree not only about the order but also about which pictures were displayed on which wall. In this case the block positions are labelled E, W, S, and N to indicate the wall.
| Image | Description | Smith | Ashmolean | Foster | Hahland | Dinsmoor | Hofkes-Brukker | Felton | Harrison | Cooper | BM/Corbett |
|---|---|---|---|---|---|---|---|---|---|---|---|
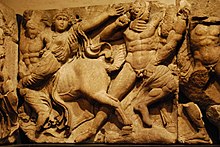 |
Centauromachy | BM520 | 21 | 05 | 09 | 01N | 17W | ( ) | 05E | 01N | 01N |
 |
Centauromachy | BM521 | 18 | 09 | 04 | 22W | 15W | 16E | 03N | 02N | 19W |
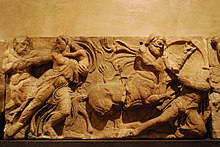 |
Centauromachy | BM522 | 16 | 06 | 04 | 19W | 09E | 17E | 06E | 04N | 18W |
 |
Centauromachy | BM523 | 13 | 01 | 03 | 04N | 15W | 12S | 04E | 03N | 04N |
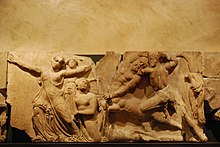 |
Centauromachy | BM524 | 19 | 02 | 11 | 05E | 11E | 14S | 07E | 10W | 21W |
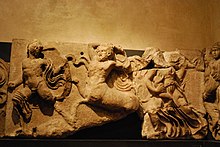 |
Centauromachy | BM525 | 17 | 04 | 10 | 21W | 10E | 20E | 01N | 09W | 23W |
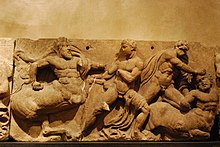 |
Centauromachy | BM526 | 23 | 07 | 02 | 20W | 14S | 18E | 23W | 11W | 17W |
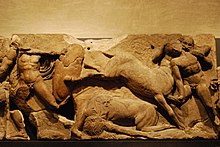 |
Centauromachy | BM527 | 14 | 10 | 08 | 02N | 08E | 15E | 21W | 06W | 02N |
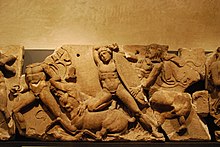 |
Centauromachy | BM528 | 15 | 11 | 06 | 03N | 18W | 21E | 22W | 07W | 03N |
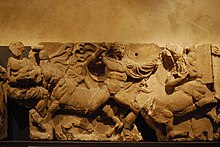 |
Centauromachy | BM529 | 20 | 03 | 07 | 18W | 12S | 19E | 20W | 05W | 20W |
 |
Centauromachy | BM530 | 22 | 08 | 01 | 23W | 13S | 13S | 02N | 08W | 22W |
 |
part of the Heraklean Amazonomachy | BM531 | 03 | 20 | 16 | 16W | 21W | 11W | 15W | 16E | 13S |
 |
The attack on the Greeks at Troy by Amazons under Penthesilea | BM532 | 01 | 12 | 15 | 06E | 04E | 05W | 09E | 22E | 08E |
 |
The first casualty of the Heraklean Amazonomachy. note - incomplete | BM533 | 02 | 13 | 20 | 11E | 06E | 08W | 10E | 18E | 11E |
 |
part of the Heraklean Amazonomachy | BM534 | 08 | 17 | 19 | 07E | 22W | 07W | 16W | 17E | 10E |
 |
part of the Heraklean Amazonomachy | BM535 | 11 | 22 | 18 | 07E | 23W | 09W | 18W | 12W | 16W |
 |
one Amazon and one Greek. First part of the Heraklean Amazonomachy (see other picture too) | BM536 | 06 | 15 | 17 | 10E | 20W | 06W | 11E | 19E | 07E |
 |
The death of Penthesilea at the hands of Achilles after the attack on the Greeks by Amazons. (incomplete picture) | BM537 | 04 | 21 | 22 | 12E | 19W | 03N | 08E | 21E | 09E |
 |
The attack on the Greeks at Troy by Amazons under Penthesilea | BM538 | 12 | 19 | 21 | 08E | 05E | 10W | 17W | 23E | 12E |
 |
The attack on the Greeks at Troy by Amazons under Penthesilea | BM539 | 07 | 14 | 23 | 17W | 07E | 02N | 19W | 20E | 06E |
 |
part of the Heraklean Amazonomachy | BM540 | 05 | 16 | 12 | 13S | 01N | 01N | 12S | 13S | 05E |
 |
part of the Heraklean Amazonomachy. note - see this picture too | BM541 | 09 | 18 | 13 | 14S | 02N | ( ) | 13S | 14S | 14S |
 |
Heraklean Amazonomachy | BM542 | 10 | 23 | 14 | 15S | 03N | 04W | 14S | 15S | 15S |
Recreation
John Henning's masterpieces were the one-twentieth scale models he created of the Parthenon Frieze and Bassae Frieze, which took him twelve years to complete.[18] John and his son, also John, used this work to install recreations of both friezes on other buildings.[19]
Description
Of the 23 slabs of the Ionic frieze 11 depict Greeks fighting centaurs and 12 represent Greeks fighting Amazons. Cooper and Madigan make a further distinction of the Trojan and Heraklean Amazonomachies following on from their determination of the blocks' arrangement. Yet contrary to customary practice these three scenes are not on separate sides of the building, but run continuously around the entablature with the only clear disjuncture at the northwest corner. This description follows Cooper and Madigan's reconstruction.
Trojan Amazonomachy
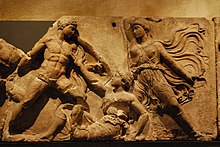
The first four slabs of the frieze, from the northwest corner to the middle of the west side, depict the attack on the Greeks at Troy by Amazons under Penthesilea BM 538, BM 532, BM 537, and BM 539 The battle itself spans three blocks, culminating in the death of Penthesilea at the hands of Achilles on BM 537, while the fourth slab, BM 539, depicts a truce at the end of the battle. ln the first pair of combatants, on slab BM 538, an Amazon has gained the upper hand over her opponent, but with the second pair the situation is dramatically reversed. Here a bearded Greek, wearing a chiton, a cuirass, a helmet, and a baldric and carrying a shield, seizes an Amazon by the hair while trampling her underfoot. He is the most heavily armed soldier in either of the Amazonomachies depicted, and the only bearded Greek, so far as we can tell, anywhere on the frieze. On the second slab, BM 532, one Amazon uses a hoplite shield to guard a second kneeling Amazon who has just shot an arrow[20] The battle reaches its climax on the third slab, BM 537, where Achilles slays the Amazonian queen. Achilles and Penthesilea[21] appear in the center of the slab, while a single Greek and a single Amazon flank them. The final slab in the series, BM 539, represents the moment when a truce has been called between the Greeks and Amazons in order to clear the battlefield of equipment, the wounded and the dead
Heraklean Amazonomachy
The next section of the frieze represents the battle between the Greeks, led by Herakles, against the Amazons in a bid by the hero to seize the belt of the Amazon queen Hippolyte. This Amazonomachy extends for eight blocks from the middle of the west side, around the southwest and southeast corners, to as far as the first slab of the east side. These are BM 536, BM 533. BM 534, BM 531, BM 542, BM 541, BM 540, and BM 535.
On the first slab, BM 536, the battle is evenly balanced, one Amazon and one Greek having the better of the fighting in a pair of duels. On the following slab, BM 533, appears the first casualty, BM 533:1, an Amazon probably holding the handle of an axe in her right hand as she collapses. Her helmet lies on the ground to her right side. The dress of the dying Amazon here, an overgirt peplos and mantle, distinguishes her from the other Amazon warriors who wear the more typical chitoniskos. The axe and helmet identify her as a combatant, and the peplos therefore must indicate that she is one of the three Amazonian queens who take part in the battle. As a queen and the first casualty she must be Melanippe, and the Greek who kills her must be Telamon.[22] Telamon, BM 533:2, stands adjacent to his victim but now has tumed his spear to another.
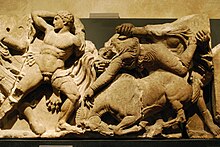
The next victim of Telamon’s spear will be the Amazon BM 531:2, who helps up a wounded comrade. Although the other Amazon along this part of the frieze not already pitted against a foe is standing directly left of Telamon (BM 533:3), she cannot be his target, for she stands on a different ground line from Telamon and must be understood to be in a deeper spatial plane. As Telamon aims his spear at a distant enemy, so she aims her arrow past Telamon, probably at the Greek on the preceding slab, BM 536:3, who is about to drag off an Amazon. The Amazon Telamon is aiming at is dressed like Melanippe in an overgirt peplos, again probably a signifier of royalty.[23] As Hippolyte will be seen later fighting Herakles, and Melanippe has already been slain, this Amazon may be identified as Antiope. The three slabs that comprise the south portion of the frieze, BM 542, BM 541, and BM 540, form a unit focusing on the figure of Herakles, BM 54l:3. The hero takes a prominent place, on the long axis of the temple and over the Corinthian capital, while at either end of the trio of slabs are balancing pairs of a Greek and an Amazon helping away wounded comrades, BM 542:1 and 2, and BM 540:5 and 4. Hippolyte, like the two other queens, is distinguished by dress. She wears a mantle wrapped about her waist, visually drawing attention to the disputed belt.
The final slab of the Heraklean Amazonomachy, BM 535, is separated physically from the preceding three, being the single Amazonomachy slab on the east side. lt also is separated temporally from the others in that it depicts a moment late in the conflict when the outcome is no longer in doubt. Thus it follows the pattern of the last scene of the Trojan Amazonomachy, marking the conclusion of the action and commenting on it. The tide of battle, distinctly on the Amazons' side along the south, has now turned against them. Here, BM 535:3, the last of the Amazons is depicted clasping to an altar[24] as she is prised away by a Greek, BM 535:4.
Centauromachy
The Centauromachy covers seven slabs along the east and four slabs of the north side of the entablature, making it the longest of the three subjects (BM 526, BM 524, BM 525, BM 530, BM 528, BM 527, BM 529; BM 522, BM 523, BM 521, and BM 520). The rocky landscape, the burial of Kaineus, centaurs fighting with tree limbs or rocks, and men with armour and weapons are all elements of a pitched battle between Lapiths and centaurs. However, four Greeks are dressed only in mantles, fight bare handed and are noticeably placed at the principal structural points: on the first slab, BM 526:2 and 3, at the corner, BM 529:4, and on the last slab, BM 520:2. Several women, too, including Hippodameia, BM 520:4, are scattered throughout the battle. These elements more commonly belong to a different scene in the Centauromachy narrative - the brawl at the wedding feast of Peirithoos. Also, the two infants carried by women, BM 525:11 and BM 522:15, are unknown in either of the two most popular versions of the battle.[which?] Further the direct intervention by the gods Apollo and Artemis, on BM 523, may also be a novel element unique to the frieze. This departure at Bassai from the more traditional designs of the centauromachy is perhaps an attempt unify it with the other two subjects of the frieze as well as to adapt the subject to the patron deities of the sanctuary.
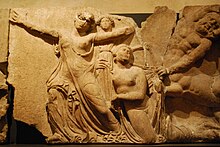
Homer relates the events of Polypites birth and the attack of the centaurs,[25] when the ritual procession to gift a girdle in the sanctuary of Artemis is interrupted. While nearing the sanctuary, the procession is set upon by a gang of centaurs, precipitating a brawl, much as had happened at the wedding feast. The first slab of the Centauromachy, BM 526, focuses on a pair of Greeks clad in mantles and fighting barehanded. Although they face in opposite directions, their poses are nearly identical, differing only in that one, BM 526:2, folds his lower left leg under the thigh as he kneels on the back of his adversary. On the next slab, BM 524, the goal of the procession, the ritual sanctuary of Artemis, is indicated by a tree hung with a lion or panther skin in thanksgiving for a successful hunt. The Greek (BM 524:1) who defends the two women against the centaur has no attributes save for the weapon that was held in his right hand. The roughly cut form that extends from the bottom of the fist seems to be the stump of a club. Into the top of the fist is fitted a metal club, requiring a stronger anchor than did the bronze swords attached to fists elsewhere. The hole for the club is therefore twice as wide and deep as those used for swords. This club identifies the hero as Theseus. The two victims of the centaur flank a small statue of Artemis. The axis of the statue is slightly off vertical, for it is not fixed to a base but carried by the priestess, BM 524:3. No base is actually seen, and the poses of the two women preclude there being one behind them. The left leg of the woman who gestures with extended arms, BM 524:4, reaches backward below the statue, where the base would be. The woman who holds the statue, BM 524:3, wraps her peplos around part of its back. As the centaur pulls the garment off her proper left shoulder, it passes behind her neck but does not appear between her nude torso and the statue. It reappears in the priestess’s left hand, being drawn from the left, up and to the right. As a result, it must be understood as partially encompassing the lower parts of the statue.
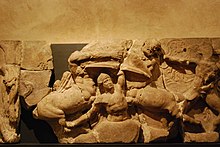
On the next four slabs, BM 525, BM 530, BM 528, and BM 527, the Greeks are meeting with little success. Each of the Greeks in this section bears some armour or weapon, but they seem to have been taken by surprise and are hard pressed to hold their own. One hero, BM 525:3, has lost his sword and now futilely arms himself with a small rock while retreating before a centaur. Elsewhere warriors hurry to the aid of comrades: 530:2, 52814. None of the Greeks achieves an unqualified victory. Rather than pitched duels, the mêlée breaks into multiple figure groups (BM 530:2, 3, 4, 5; BM 528:1, 2, 3; BM 527:1, 2, 3, 4) in which the distinction between victor and vanquished is often clouded. Appropriately for this kind of disorganized fight, the centaur attack employs weapons and tactics alien to the hoplites’ traditional mode of combat. One centaur (BM 525:2) swings a tree branch; others (BM 53(1) and 5) use huge stones; still another (BM 527:2) kicks and bites. Emblematic of this portion of the Centauromachy is the death of Kaineus, BM 530, where the hero, invulnerable to conventional weapons, is disposed of by being buried alive.
The last slab of the east side, BM 529 (Fig. 12, Pl. 45), restores a sense of ordered warfare, and the fortunes of the Greeks improve. One each of the armed (BM 529:2) and unarmed Greeks (529:4) is victorious over a centaur. The north portion of the frieze (Fig. 13), like that of the south that faces it, depicts the most important part of the action and is segregated from the rest of its subject by its compositional unity. The compositional patterns on both the north and south conform to the architectural forms below the frieze. On the three slabs at the south, groups balance one another in axial symmetry around the prominent central figure of Herakles, who stands above the Corinthian column. The four slabs on the north divide into two pain; the movement of the figures is largely centrifugal, so that the formal and narrative void at the center of the frieze echoes the architectural void of the doorway below. This centrifugal design brings to a halt the right-to-left movement of the spectator around the cella at the point where the frieze ends and he leaves the temple.

On the first pair of slabs at the north, Artemis has arrived in her chariot drawn by stags, with her brother Apollo, who has already alighted and draws his bow, BM 523. The rightward movement of the divine pair continue in the woman, the lint centaur, and the hoplite on the slab at the comer, BM 522. ApoIlo’s target is the centaur immediately before him, BM 522:4, who has grabbed hold of a woman carrying an infant, BM 522:3. Only she among the women in the Centauromachy is in the clutches of a centaur, yet undefended by a mortal.
The movement in the two left-hand slabs on the north is largely to the left. Although the first group of centaur and hoplite, BM 521:1 and 2, is virtually identical to the pair BM 522:1 and 2, the hoplite on BM 521 props himself on his shield, which serves as a visual stop to the centaur’s charge and as a reinforcement to the axis of the north side. The two figures on the left of the same slab, BM 521:3 and 4, repeat the pair of woman and centaur of BM 522:1 and 2. Here, however, the woman is not attacked by the centaur but runs past him. The centaur directs his attention to the hero on the next slab, BM 520:2, at whom he hurls a rock. The hero already grapples with one centaur, BM 520:1. As the only hero to engage two centaurs at once, and because of his proximity to the woman being carried away, BM 520:3, he must be Peirithoos. The woman is Hippodameia, the only woman being abducted.
The four others who also have no cape: are all brought down from behind by Greeks: BM 526:1, BM 524:2, BM 528:23, BM 529:1. They must have been part of the procession and, lacking the advantage of surprise that the attacking centaurs had, were the first victims of the Greeks. The two pairs of slabs that form the north part of the frieze share the same general figural pattern. A male and female pair, divine or mortal, dominate the left slab. On the right slab, a female and centaur are placed at left and a centaur and hoplite at right. This repetition highlights the contrasting movements in each pair away from the central axis.
Access
The frieze can be seen in the British Museum's Gallery 16, near the Elgin Marbles.[7] The room is not always open, but researchers can request it be made available.
Cockerell also decorated the walls of the Ashmolean Museum's Great Staircase and that of the Travellers Club with plaster casts of the same frieze.[14] The Ashmolean Museum in Oxford is open to the public. The wealthy landowner Thomas Legh was one of the excavators of the temple[26][27] and a plaster cast copy of the frieze is displayed in the Bright Gallery of Lyme Hall, Cheshire, one of his stately homes.[28]
References
- ^ Discovered in 1959 by N Yalouris and confirmed by a subsequent dig in 1970, see Cooper, Bassitas:1, p.81 ff.
- ^ 8.41.7 ff.
- ^ Contemporary with, but not necessarily related to, the Plague of Athens as Pausanias would contradict Thucydides 2.54.5 that the plague didn't affect the Peloponnese. This inconsistency has led Carl Peterson to propose a date of c. 420 for the dedication of the temple. See Cooper, Bassitas:1, p.75.
- ^ Made by Hofkes-Brukker, principally in Die Nike des Paionios und der Bassaefries, BABesch, 36, 1961, see Madigan, Bassitas:3, p.34
- ^ Madigan, Bassitas:3, p.35-6
- ^ Though the number is by no means agreed upon, Madigan:Bassitas:3, p.91, n.1 remarks that H. Kenner detects 9, Rhys Carpenter in unpublished notes finds 5, BS Ridgway 4 and U. Liepmann 3 groups with a pattern of influence working amongst them.
- ^ a b Bassae Sculpture, British Museum.
- ^ Cooper, Madigan, Bassitas:3, p.113 ff.
- ^ William Bell Dinsmoor, "The Temple of Apollo at Bassae" Metropolitan Museum Studies 4.2 (March 1933:204-227) p 204, notes Bocher's drawings, acquired by the Victoria and Albert Museum in 1914.
- ^ Frazer, Commentary on Pausanias, vol. 4, p.404 notes 1808 by the English travellers Leake, Dodwell and Gell, but Cooper, Bassitas, vol. 1, p.13, n. 9 is more detailed.
- ^ Peter Oluf Brondsted, John Foster, Georg Christian Gropius, Thomas Leigh, Jacob Linckh, von Stackelberg, Cockerell, Haller, Breymann and Koes.
- ^ Dinsmoor 1933:205.
- ^ A. H. Smith, A Catalogue of Sculpture in the Department of Greek and Roman Antiquities, British Museum, vol. 1, p.270-288, (BM 520-542), 1892.
- ^ a b Beazley Archive
- ^ The Bassai Sculptures / The Phigaleian Frieze, British Museum, retrieved July 2010
- ^ a b Plaques on exhibit, Room 16, British Museum, seen June 2010
- ^ Greek architecture and its sculpture, Ian Jenkins, Harvard University Press, 2006, p.134
- ^ John Henning’s miniature casts of the Parthenon frieze, British Museum, retrieved June 2010
- ^ John Malden, ‘Henning, John (1771–1851)’, Oxford Dictionary of National Biography, Oxford University Press, Sept 2004; online edn, Jan 2008 accessed 10 June 2010
- ^ The group strengthens the identification of the bearded Greek on BM 538 as Ajax by retailing his similar shielding of the archer Teukros in the Iliad (8.266-272, l2.36l-363, 15.442-444). Madigan, Bassitas, 3, p.70.
- ^ Here identified by a crown as was, but is now a cutting around the top of her head, Cooper, Madigan, Bassitas, vol 3, p.71.
- ^ From Schol. Pindar, Nemean, 3.64, see Madigan, Bassitas, 3, p.74, n.23.
- ^ Madigan, Bassitas, 3, p76.
- ^ Perhaps, as on BM 524, that of Artemis, who intervenes in the Centauromachy, see Madigan, Bassitas, 3, p.77, n.33
- ^ Iliad 2.738-744
- ^ Greek architecture and its sculpture, Ian Jenkins, Harvard University Press, 2006, p.253
- ^ Cooper, Madigan, Bassitas:III, p.23
- ^ Jenkins, Ian (1990). "Acquisition and Supply of Casts of the Parthenon Sculptures by the British Museum, 1835-1939". Annual of the British School at Athens. 85: 89–114. doi:10.1017/s0068245400015598. JSTOR 30102843.
Bibliography
- Mary Beard and John Henderson, Classics: A Very Short Introduction, 1995.
- C. Cockerell, The Temples of Jupiter Panhellenius at Aegina and of Apollo Epicurius at Bassae near Phigalia, 1860.
- Frederick A. Cooper, Brian C. Madigan, The Temple of Apollo Bassitas, 4 vols. 1992-1996
- W.B. Dinsmoor, The Sculptured Frieze from Bassae (a Revised Sequence), AJA, 60, 1956, pp. 401–452.
- C. Haller, Le Temple de Bassae, G. Roux ed., 1976
- C. Hofkes-Brukker, Der Bassai-Fries, 1973.
- O. Palagia, W. Coulson eds., Sculpture from Arcadia and Laconia., 1993.
- B. Ridgway, Fifth Century Styles in Greek Sculpture, 1981.
- M. Robertson, A History of Greek Art, 1975
- O. von Stackelberg, Der Apollotempel zu Bassae in Arkadiens, 1826.
External links
- Images from the frieze, research group of the University of Barcelona
- Nineteenth century albumina prints
- Study of the Bassae Frieze by Cem Kocu of Birkbeck University, including a tool allowing you to move around the order of the panels according to various scholars
